50 Top Detailing Tips
A full half-century of professional tricks and tips put together specifically to push your detailing to the next level.

 Skip to content
United Kingdom
Looking to set you or your business apart from the rest? Our Finesse Your Detail Course is dedicated to all those little extras - the essential touches and best detailing products that make a huge difference to the overall finish of any vehicle.
We'll take you through every conceivable area, from arches and tyres to trim and interiors, using a range of supreme Auto Finesse Cleaning, Polishing and Finishing Products, highlighting every commonly forgotten area along the way.
Whether you’re an enthusiast detailing your own car, or a trade professional looking to give your clients the best possible service - not to mention something a little special at the end of each job - here you’ll learn the art of impeccable finishing, along with a whole host of professional tips and tricks guaranteed to take any detail to the next level.
Throughout the duration of this course, we answer a host of commonly asked questions such as: How do I protect my plastics from UV fading? What’s the best way to apply my tyre dressing? And, How do I finish my satin paint or vinyl wrap?
We also tackle the more intricate vehicle areas such as door catches, grilles, inside fuel filler caps and exhaust tips, showing you exactly how to get the very best from such Auto Finesse kit bag essentials as – Dressle All Purpose Dressing, Finale Quick Detailer, Revive Trim Dressing and Mercury Metal Polish.
No matter your skillset, what you’ll find here is a whole load of the processes and pro finishing touches that transform a mere basic valet into an impeccably finished detail.
Arches - Discover how to finish your inner arches to match the rest of your jaw-dropping detail and protect them from the fading brought on by UV radiation.
Wheels – How to dress your tyres to a show-worthy finish and how valve caps that cost pennies can make your wheels look a million dollars.
Trim - Take on even the most awkward exterior trim and learn all about protecting plastics and rubbers from the elements.
Glass – Bringing tired glass back to life and restoring clarity with a combination of glass polish and solvent-based cleaners, and seeing why you should be cleaning your wipers on every detail.
Metalwork – Finding, cleaning, polishing and bringing back the shine to numerous stainless, polished and chrome parts, including those all-important exhaust tips.
Interiors - No need to cry over spilt drinks, instead clean those stains away the right way while you tackle other commonly forgotten areas such as air vents and seatbelts.
Bodywork - The final finishing of all your exterior paintwork, no matter the type, and the best products to use along the way.
It's time to discover a whole host of small processes that utilise supreme finishing products and add up to make a huge difference to the finished article. And see the quick and easy steps that separate a basic valet from a professional finish where it's obvious that you always go the extra mile. But, just before we show you our top tips, let's have a look at what you need along the way.
Detailing Products
Mercury Metal Polish - Light abrasive cleaner polish for metal surfaces such as exhaust tips, wheel lips and brightwork.
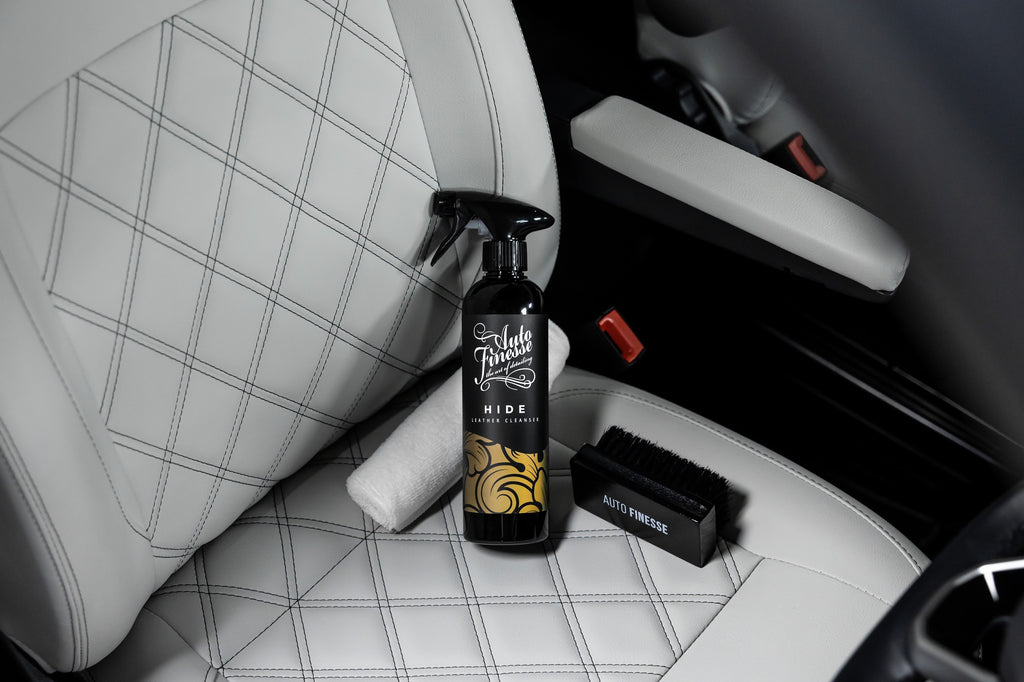
Total Interior Cleaner - Powerful Interior Cleaner capable of removing stains, spills and ground-in grime. Safe for use on all materials including carpets, upholstery, leather, plastics and rubber.
Finale Quick Detailer - Water-based, carnauba-infused finishing spray used to perfect all vehicle surfaces in the final stages of any detail.
Glisten Spray Wax - Wax emulsion finishing spray used to add quick protection and shine to paint and vinyl.
Vision Glass Polish - Abrasive cleaner polish used to deep-clean and restore tired vehicle glass.
Crystal Glass Cleaner - Finely balanced, distilled solvent solution that's safe to use on all glass surfaces and designed to cut through grime, sticky contamination and greasy films.
Revive Trim Dressing - Silicone-based, water-resistant dressing used to revive and protect factory plastic trim.
Accessories
Detailing Brush Trio - Set of 3, scratch-free Detailing Brushes useful for safely agitating a range of cleaning solutions in and around the vehicle.
Upholstery Brush - Essential for agitation of interior cleaning solutions and for deep-cleaning fabric convertible roofs.
Primo Plush Microfibre - Ultra-absorbent, 600GSM premium microfibre towel, ideal for many finishing tasks including buffing paintwork and soaking up finishing sprays.
Superior Waffle - Designed specifically for use with spray-on glass cleaners, the waffle weave material has been specially developed to pick up and trap particulates and sticky residues.
Tyre & Trim Applicator - Contoured soft-foam applicator designed for easy application of tyre and trim dressings.
Microfibre Applicator - Dual sided microfibre applicator pad used for applying and working through polishes, along with the application of dressings.
Microfibre Work Cloths - 300GSM general-use microfibre cloth, suited to a huge variety of cleaning, polishing and finishing tasks.
Foam Applicator - 100mm soft foam applicator pad ideal for applying dressings, gels and sealants.
Giving plastic inner arch liners a supreme professional finish is a quick and easy process, but one that's all too commonly forgotten during the finishing stages of any big detail. What with sparkling alloy wheels and glossy paintwork being key focal points to any observer, dull and tired arch liners will almost inevitably draw the eye away, letting down an otherwise immaculate detail.
The truth is that you will have spent your time in the wash stages purging the wheel wells of grit and grime, so dressing them to perfection as part of your finishing routine is always something of a no-brainer.
This process does of course, depend on the type of arch lining on your vehicle, only plastic arches can be dressed as part of the finishing stages. Although they're not as common as plastic liners, some vehicles will have a carpet lining or no under-arch protection at all. In these cases, the only solution is to ensure that these areas are cleaned thoroughly, and the good news is that only plastic arch liners tend to fade, so you won't need to dress carpet liners or bare arches anyway. You can find a full run-down of how to clean your arches in the professional way in our Back To Basics Course.
With plastic inner arches however, you can quickly leave a better-than-factory finish using Dressle All Purpose Trim Dressing. This water based, spray-on solution bonds to bare plastics and contains advanced UV inhibitors to help prevent fading in the future. Dressle contains no waxes, oils or petroleum distillates, meaning it will not harm surfaces and, as well as darkening and bringing faded plastics back to life, it will also leave a protective barrier barrier, helping to prevent grime from becoming engrained, and making cleaning easier during routine maintenance. Using Dressle as a finisher is ideal for both bigger details and maintenance washes alike.
Application is simple, maintaining a distance of roughly 15cm, spray a generous amount of Dressle onto the arch liners ensuring even coverage.
If access is tight - particularly on vehicles which have been lowered - a good professional tip is to rotate the front wheels or jack up the vehicle to ensure that the whole arch is treated.
The Auto Finesse® Dressle is a versatile all-purpose Car Trim Dressing for the exterior and interior trim and must have car detailing product. This liquid, dry... See product details More
Finishing your tyres with a suitable dressing is another touch that will set your detail apart from any other. It's a quick and simple finisher offering that sought-after showroom finish and one of the tricks that professionals use to instantly enhance the appearance of any vehicle.
Dressing your tyres is not only for looks though, adding a premium dressing such as Satin Tyre Crème - the product we're using here - is also a way of conditioning your tyres, this water-based formula is designed to soak into the top layer, nourishing the rubber from within to help prevent premature cracking. UV inhibitors are another important part of the solution, these help to shield the tyre from fading and browning.
Of course, any time you add a tyre dressing, you're creating a barrier to the elements, too. This is never a bad thing as it makes it much harder for road grime and salt to become ingrained in the surface. This also helps make your tyres easier to clean the next time around. A good tyre dressing can be reapplied after every maintenance wash, giving the "finished' look every time you detail.
In terms of finish, dressings tend to range from a subtle, satin finish to those which offer the high-gloss wet look often associated with show cars. It's all down to personal preference but, rather than having to make a decision right away, with Satin Tyre Crème, you can choose the finish you require during your detail. A single application gives a natural, matte sheen, while multiple applications builds up a wet look shine.
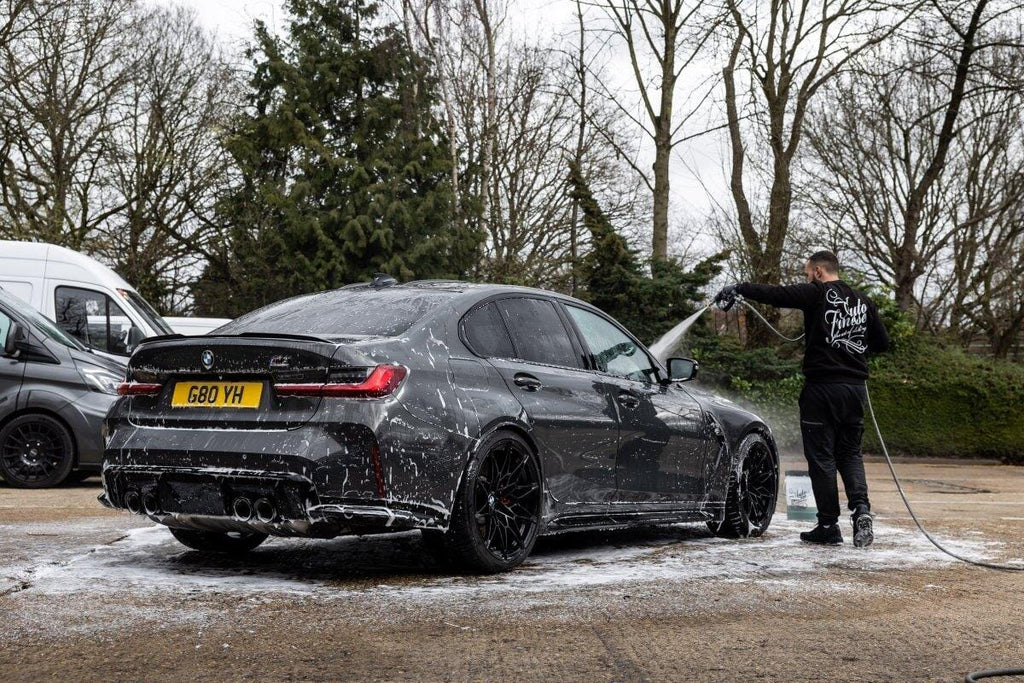
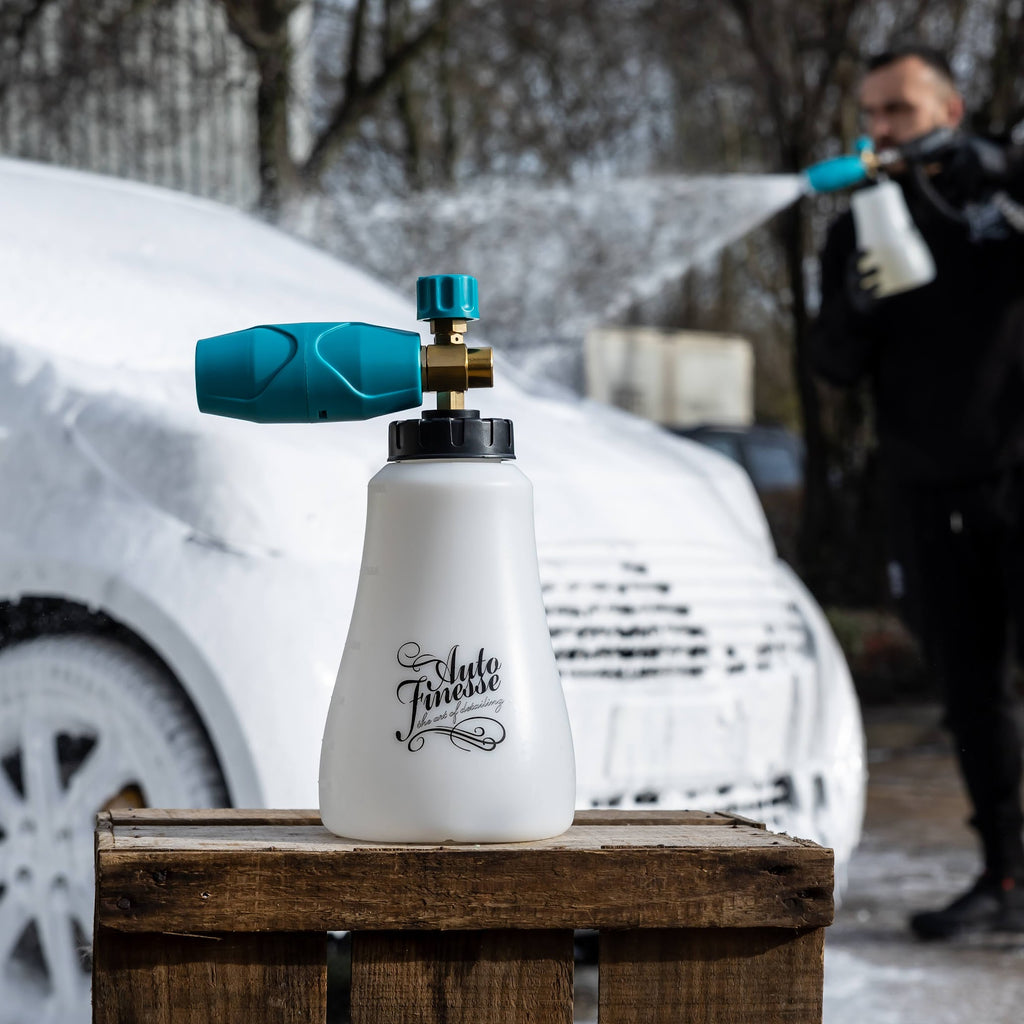
Remember though, one of the most important parts of tyre dressing isn't actually dressing the tyres at all - it's making sure they're free of grit and grime during the wash stages. Always remember to clean your tyres as this not only stops dirt form interfering with the finish, but it also helps your tyre dressing to fully bond, meaning it will last longer. We recommend using Tread Tyre Cleaner, along with a Rubber Scrubber Tyre Brush during your normal detailing routine. You can see the full tyre cleaning process in our Driveway Warrior Course
When it comes to applying your dressing at the end of your detail, we find that targeted application using a Tyre & Trim Applicator is best to avoid any unwanted product on wheels and other parts of the vehicle. Even with a spray-on product - such as our silicone-based Gloss Tyre Dressing - we often apply via an applicator, to ensure the best, even coverage. Satin, being a vicious cream-based product (as opposed to a sprayable liquid) has been developed specifically for this kind of targeted application.
First, we apply a small amount of Satin Tyre Creme onto a Tyre & Trim Applicator or Tyre Spot Pad, squeezing the cream out in a straight line, we then fold the applicator in half to evenly distribute the product. Remember that a little Satin goes a long way, you're not looking to soak a whole load into the foam, only the product on the surface will be transferred to the tyre.
Our top professional tip for application is to imagine your wheel and tyre as a clock face...
We apply Satin to the sidewall from the 7 o'clock position, moving clockwise, working the product in until we get to the 5 o'clock position. Once the bulk of the sidewall is complete, don't forget to double check that the creme has been transferred to the very edge, particularly the bead where the tyre meets the rim. Try to avoid getting the dressing on the wheel itself, it will not harm the surfaces of course, but being careful simply means you won't have to go around the rim wiping away any smudges. The outer edges of the Tyre & Trim Applicator - the points - are specifically designed to make this process far less awkward.
We purposely leave bottom area (5-7 o'clock) of the sidewall untouched so, after completing the first stage on all four tyres, we can reposition the vehicle and cover these areas without any struggle.
Doing this allows us to get a full and even coverage of the entire tyre without risk of our applicator touching the ground and collecting any dirt or debris.
It almost goes without saying that, if your tyre applicator does make contact with the ground, it is strongly advised to dispose of the applicator and start afresh with a new one. You won't damage your tyres further than making them dirty, but it's definitely not worth the risk catching your wheels! You'll hear us say time and time again that this goes for any applicator, wash mitt, cloth or drying towel that may have been dropped on the floor.
Shift the vehicle forward a few feet and then go ahead and complete the remaining sidewall on each tyre. And that's the job done!
A great little trick of the trade for not letting the smaller details detract from an impeccable finish is simply to replace tired, or missing, valve caps. While this isn't applicable to all vehicles, a gesture as cheap and simple as this can make a difference to the overall visual appearance of your (or your client's) wheels.
These are available from most auto stores and, if you're a professional detailer land detailing multiple cars regularly, can also be bought in bulk at a very low cost - we purchased 100 of them online for just £2.69 - that's under 3-pence a wheel.
A cheap, worthwhile fix that can make more difference than you might think.
It's a process that's often overlooked, but a detail just wouldn't be a detail if we didn't address some of the smaller touches that make all the difference. After all, effective finishing isn't just a case of perfecting the main focus of the detail, but about how the whole package comes together without other parts detracting from the rest. Ultimately, the more components that you finish effectively, the better the overall finish.
Unpainted plastic trims are notorious for fading over time, usually brought on by the effect of the sun (UV radiation) along with exposure to the elements for prolonged periods. Low-quality aftermarket parts can compound the problem and it's almost inevitable that you'll see faded plastics on older vehicles. But that's not to say that plastics shouldn't be dressed on modern vehicles, too. The process is as much about protecting them from fading in the future, as it is for making them look good now.
Dressing the most obvious exterior trim, such as bumper trims and window rubbers, isn't where your detail should stop, either. There are many other areas that can benefit from a dressing, including hidden areas such as inside filler caps, and even the odd painted/powdercoated trim such as wiper arms. Of course, every vehicle is different and will have different areas that require finishing, so always take your time to identify any trim that can be dressed effectively.
Revive Trim Dressing is our product of choice here, this water-resistant, silicone-based gel darkens and restores plastics and rubber trim, leaving behind a dry-touch, satin finish. This product is also designed to shield from the fading effects of UV radiation, with durability that far exceeds conventional, water-based dressings.
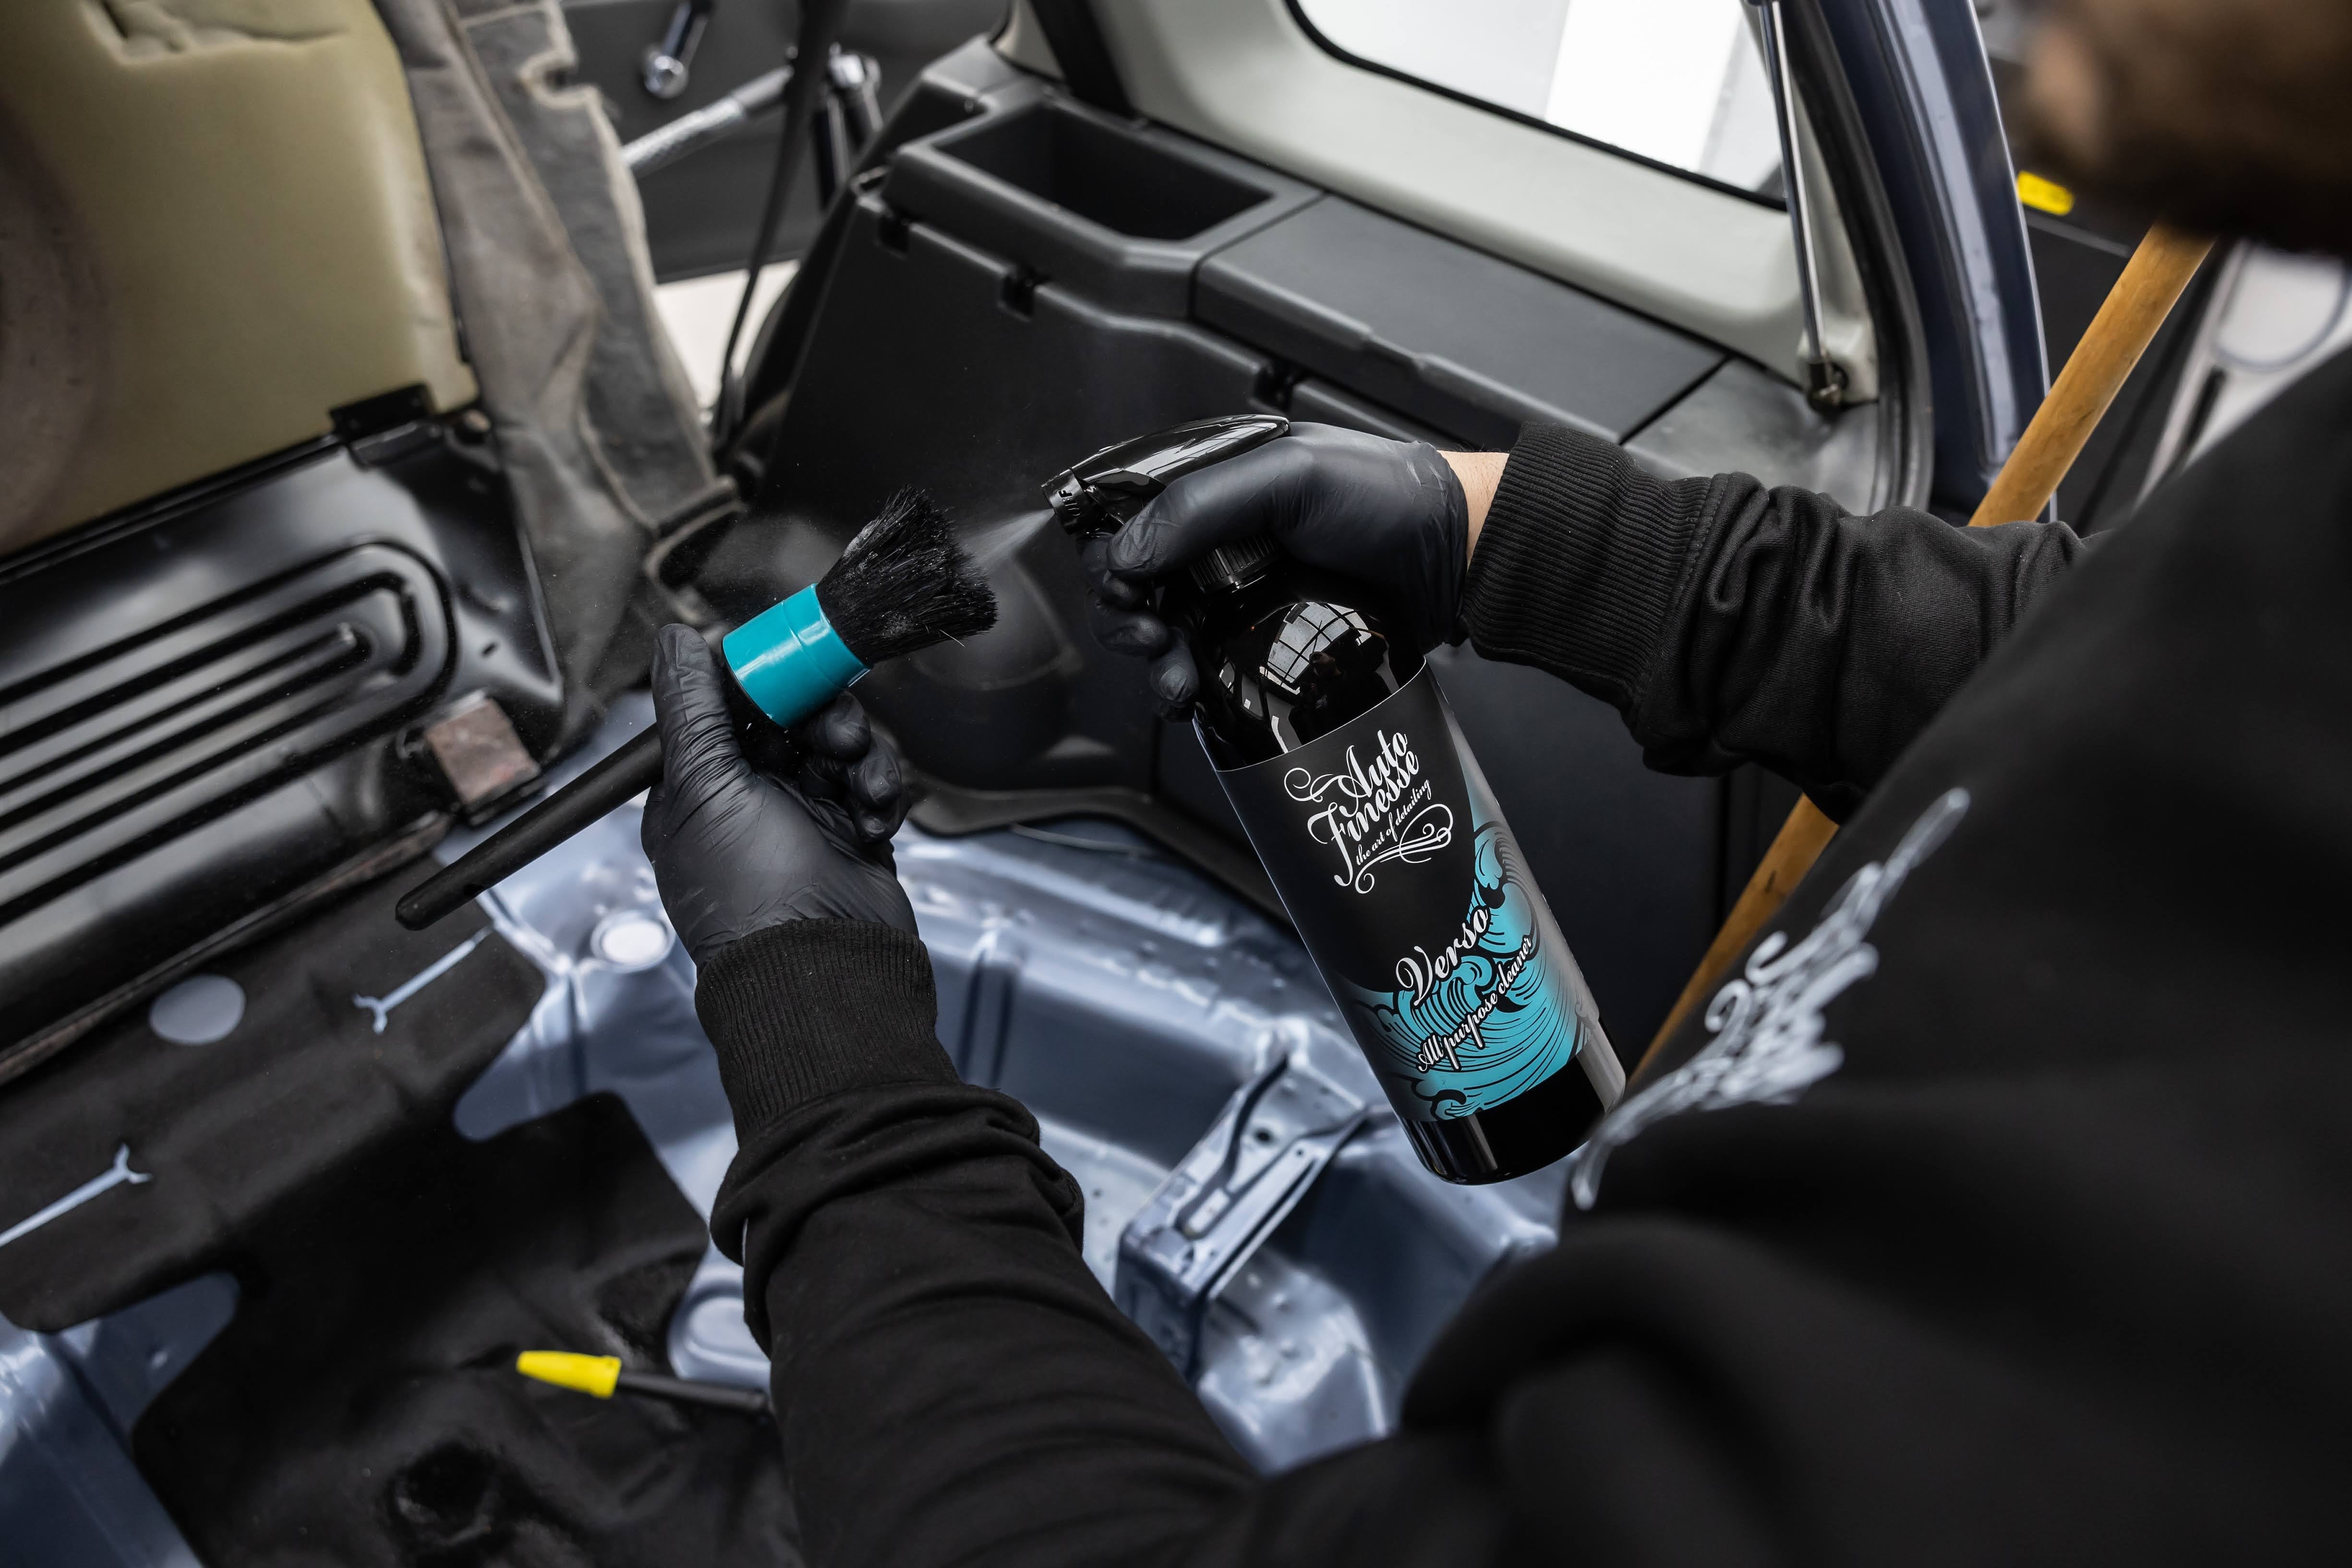
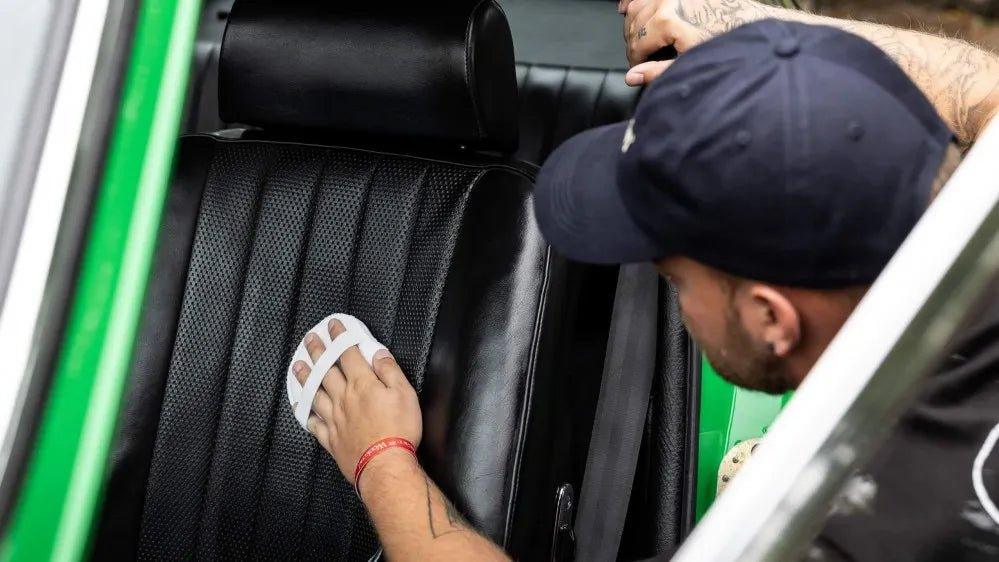
Once again, it's important that any area you dress is clean and dry, this will allow the Revive gel to bond and cure, giving the maximum longevity and the best finish. For the best results on areas that have picked up ingrained contamination, we recommend preparing bare plastic trim and rubber with a 1:10 dilution of Verso All Purpose Cleaner, agitated with a Detailing Brush or Microfibre Work Cloth. This will ensure the area is free of grime and grease, allowing the dressing to bond most effectively.
When it comes to applying Revive - no matter the area we are working on - we always start with a small amount of dressing on a Foam Applicator. This is applied directly to the trim, working in with medium pressure, taking care to get the coverage as even as possible along the way.
After working the product in, leave to cure for 5-10 minutes, before removing any excess and lightly buffing to a satin finish using a Microfibre Work Cloth.
A top professional tip is not to over-apply your dressing, a little product really does go a long way. Instead build up multiple layers only when you need to, until you get the desired result. In some rare cases - usually when older plastics and rubber trim are extremely faded - you can allow the Revive to soak in and repeat the process (before buffing) until the trim is sufficiently brought back to life.
A comparison shot below shows the difference that Revive can make with a single application - a noticeable improvement over the tired and faded grey plastic, and another small touch that makes a great addition to any detail.
Many professional detailers have said that sparkling, smear-free glass always shows the difference between a good detail and a flawless detail. This is one of the key reasons why we always finish our exterior glass as near to the end of our detail as possible. It's almost inevitable that glass will pick up some dust or the odd fingerprint while you finish off the rest of the vehicle, so we utilise our solvent-based Crystal Glass Cleaner to ensure that every job is finished to perfection. For the trade professionals this step is doubly important, because this is shortly before the car is given back to the client.
In some cases, vehicle glass can be in need of a little restoration. Over an extended period of time, glass can become dull through the onset of oxidation, and sometimes it may be suffering from stubborn watermarks, other ingrained mineral impurities, protein deposits or industrial fallout. These are the times when it will benefit most from the use of Vision Glass Polish, our go-to product for bringing vehicle glass back to life.
This product is classified as a cleaner polish, so while it uses abrasives - just like a polish or compound designed for use on paintwork - it also comprises of solvents and deep cleaning agents designed to dissolve or lift contamination. The advanced diminishing abrasives are designed to be easily broken down, making it ideal for hand polishing, but for the most stubborn tasks Vision can also be used with a machine polisher.
When using Vision, aim to tackle a manageable section at a time - half a windscreen or a side window is ample - this will ensure that there is enough product to spread over the area without spreading the abrasives and cleaning agents too thin. Your exterior glass should already have loose grime and grit removed during the wash stage process, so you'll be using this polish to restore the glass surface and target the engrained contamination.
Apply 2-4 pea sized dots of vision to a Microfibre Applicator and then dab the product around the glass approximately 4-6 times, this ensures an even spread.
Begin to work the product into the glass using small circular motions with medium pressure. Make small overlaps and apply in a straight line around the window edges to ensure full coverage. The pressure and motion of your applicator will work through the abrasives, fully breaking them down.
Leave the polish residue to haze for a minute or two before buffing away with a fresh microfibre cloth. You'll see that the residue wipes cleanly off the surface, taking with it any contamination and spent, or worked-through, abrasives. Once the residue has been removed, fold your cloth to reveal a fresh portion and buff to a crystal-clear finish.
Vision is suitable for all vehicle glass including mirrors and can even be used on tinted windows. This product is also ideal for preparing the glass surfaces for the chemical bonding required by ceramic glass coatings.
A top professional tip is to use Vision as part of the correction or finishing stages and then, at the very end of your detail, clean the windows once more using Crystal Glass Cleaner and a Superior Waffle. This will make sure that any stray residue - or fingerprints and dust that may have been picked up in the interim - are removed, leaving nothing but a streak and smear-free finish.
A quick, and thoroughly worthwhile, touch during your detail is to clean your wipers. This process is commonly forgotten but can go a long way to preventing any trapped grime or grit from scratching your glass or abrading any ceramic glass coatings that have been applied. Dirty, sticky wiper blades also tend to judder when in use and cleaning them is an easy way of curing the problem. This process will also substantially prolong their life.
Our go-to product for the task is Crystal Glass Cleaner, this solvent-based solution quickly lifts away ingrained grime and dissolves sticky residues allowing them to be wiped away.
Simply spray a little Crystal onto a clean microfibre Work Cloth and wipe vigorously over the wiper blade - it's surprising how much contamination you can pull out.
Offering the ultimate finishing touch for any detail, Crystal Car Glass Cleaner has been specifically formulated to cut through greasy films, water spots, dryi... See product details More
Perfecting bare metal surfaces is another process that can often be missed during any detail. Again, completing every area possible will not only add to the overall finish, but most importantly doesn't detract, or draw the eye from, the rest.
Because of the nature of how bare metal surfaces are prone to scratching, staining and oxidation, these areas can be easily enhanced by using a specialist metal polish. As with all polishes and compounds, these use abrasives to take away a minuscule amount of the top layer, to reveal the fresh metal - and the original lustre - underneath. The most advanced metal polishes - such as our Mercury Metal Polish and Mercury Xtreme Metal Polish - are also classed as "cleaner polishes' meaning that they contain a blend of solvents and cleaning agents designed to help remove stains, ingrained grime and oxidation. The difference between these two products is that Mercury Xtreme uses slightly coarser abrasives to tackle the toughest deep cleaning and refining jobs.
Bare metal surfaces range from stainless steel and aluminium to chrome and plated finishes, and how many you'll find will always vary from vehicle to vehicle. Classic cars for example tend to use a lot of bare metal brightwork as trim, where some modified cars may have a huge amount of polished metal in the engine bay, or polished wheels. In all these cases, the finish can be quickly and effectively enhanced using Mercury or Mercury Xtreme.
Stainless steel or chrome plated exhaust tips and back boxes are perhaps the most common part to find on modern cars, not to mention a finishing staple for many a detail. It's worth remembering that not all exhaust tips are bare metal though, those with a carbon fibre or burned titanium finish shouldn't be polished, instead these can be cleaned effectively using a 1:5 dilution of Verso All Purpose Cleaner.
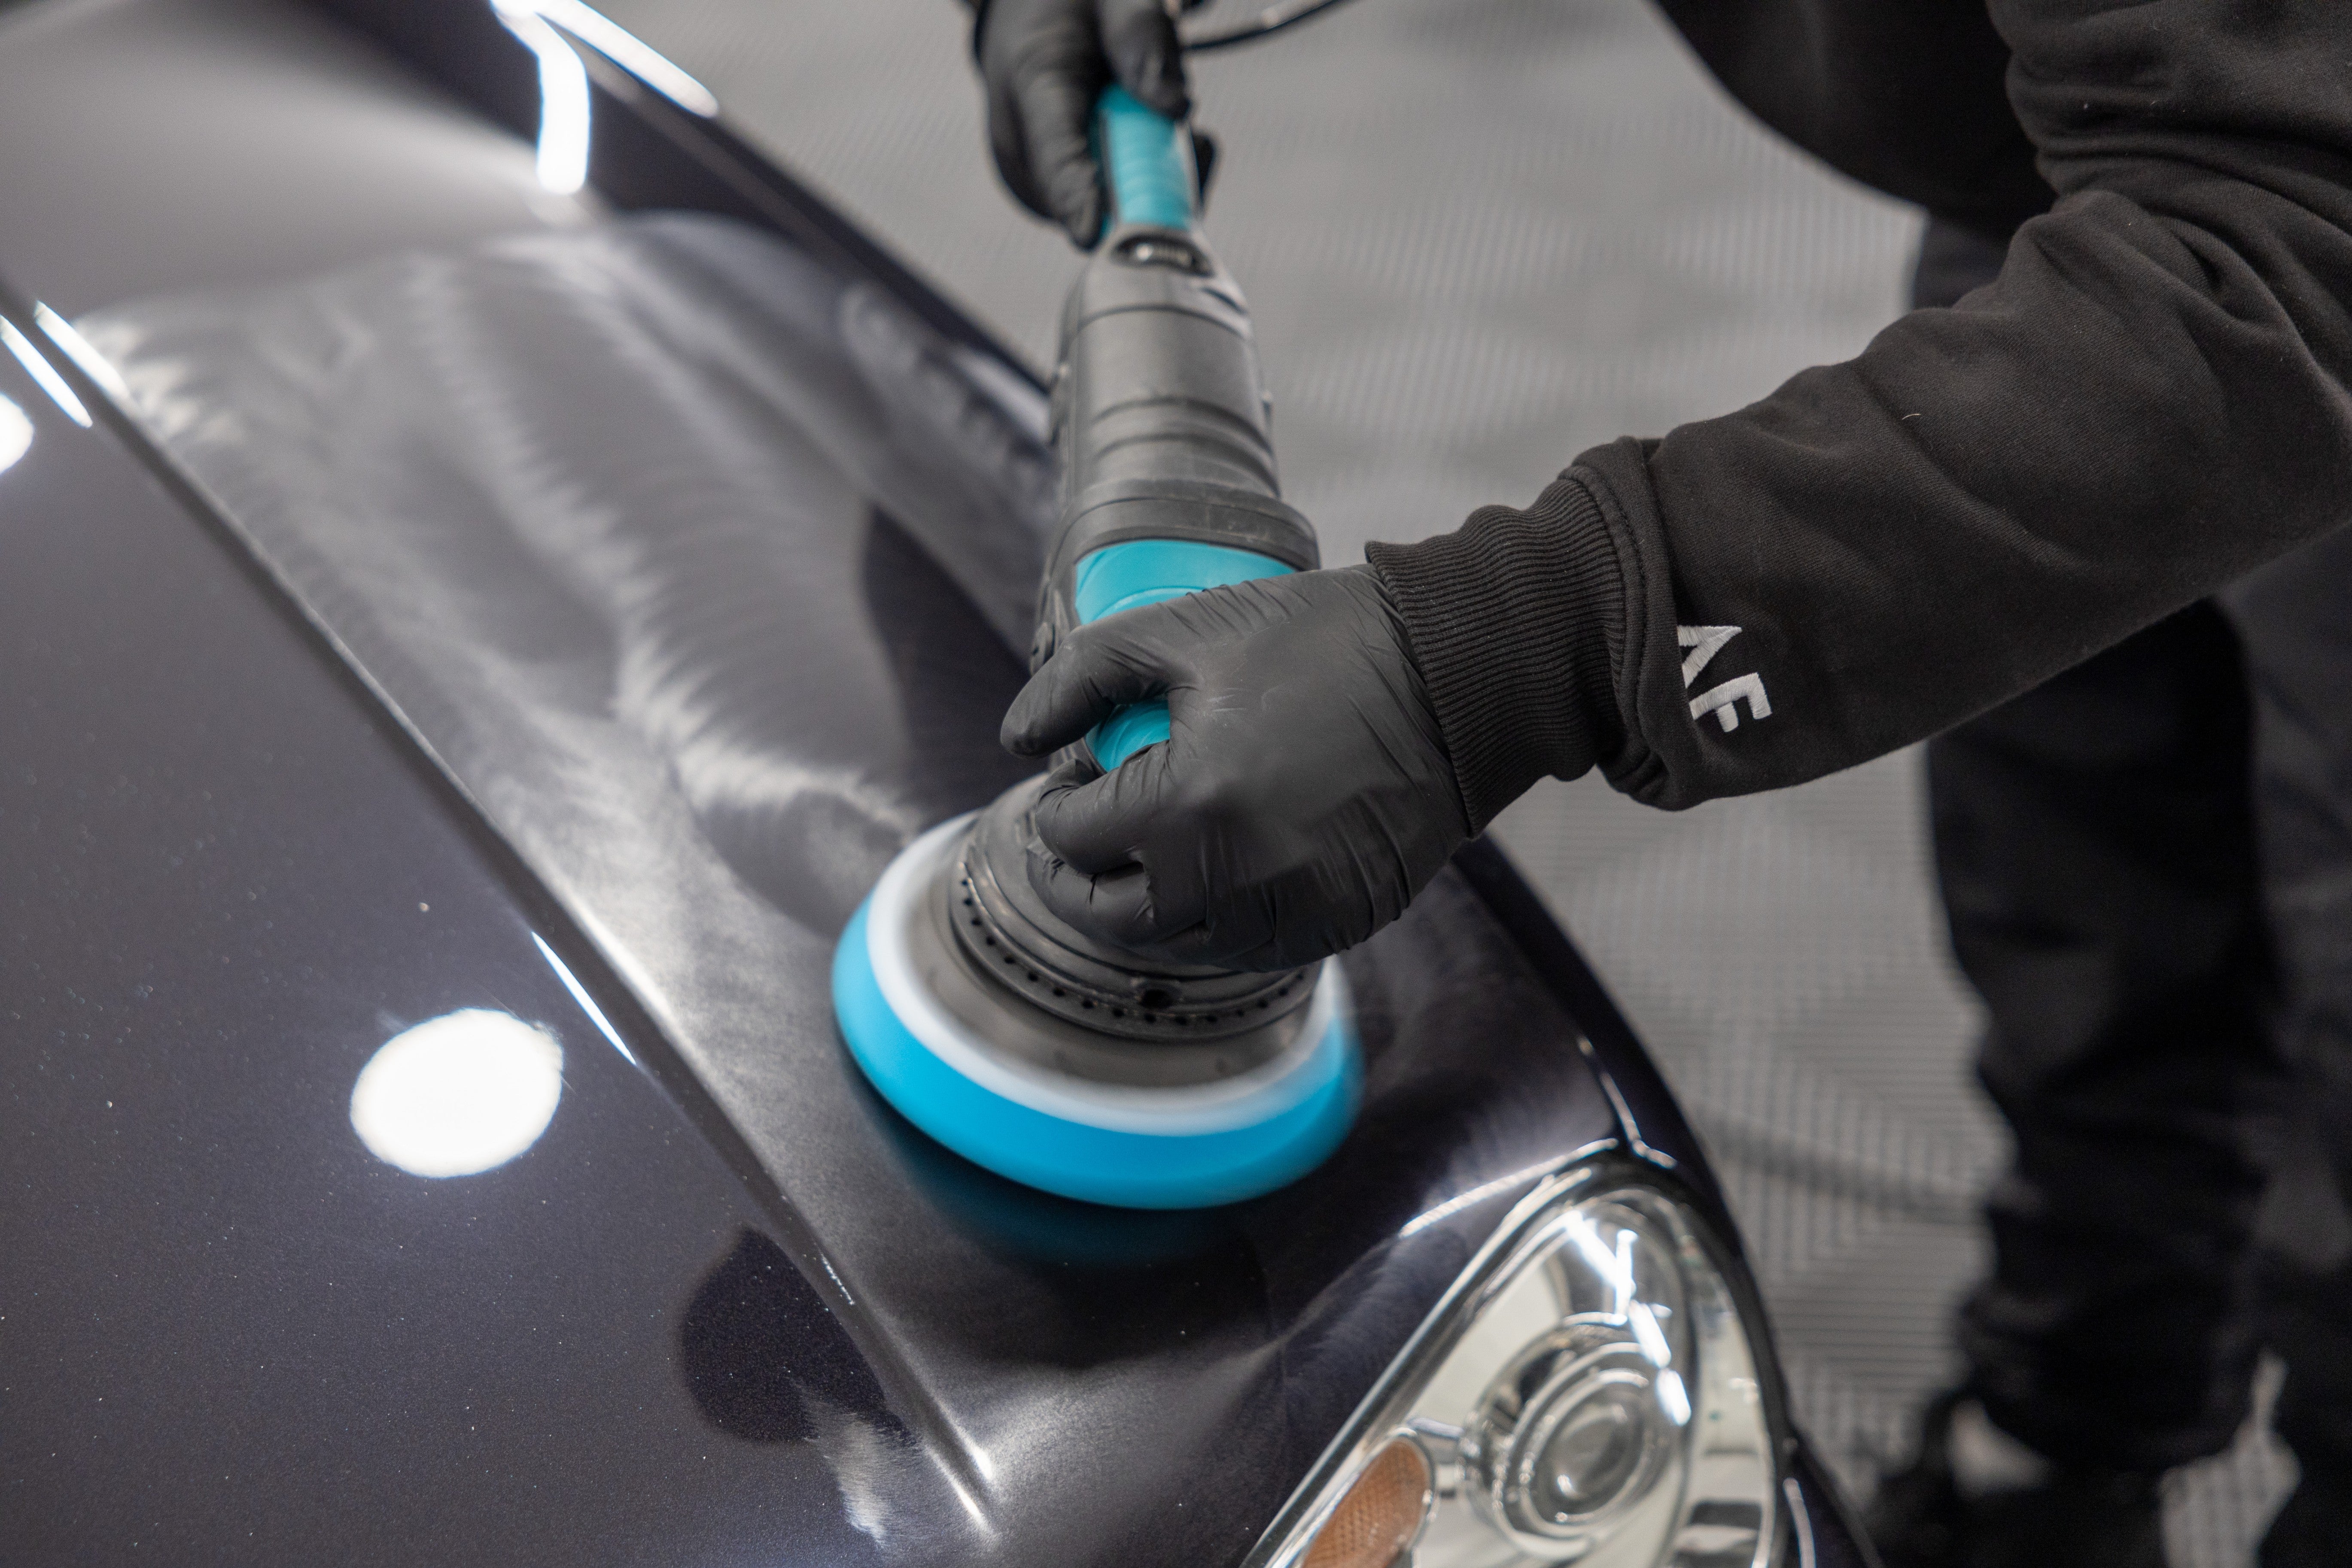
In some cases, and it isn't always obvious, but some exhaust tips may be clear coated for protection. This is often the case with polished alloy wheel lips, and various other trim pieces too. Again, it's worth noting that a metal polish is only used to clean and enhance bare metal, it has to make direct contact with the surface and will be blocked by any lacquer layers. That said, it's easy to find out if you have bare metal or clear-coated metal - simply add a little metal polish to a microfibre cloth and work into a small area. If your cloth turns black it means that there's no lacquer. Conversely if it's just polish residue on your cloth, it means that the surface has been clear coated. These surfaces can still be polished, but using a product designed for clear coat and paintwork, such as Tripple All-in-One Polish.
Once you've ascertained that the metal part can be polished successfully, apply a little of your metal polish onto a Microfibre Work Cloth or Microfibre Applicator and work into the surface with firm pressure. As you work the product into the surface you're essentially making sure that the solvents make contact with, and get to work on, any oxidation and staining, and that you're fully breaking down - or working through - the abrasives. You'll immediately see that the metal surface underneath is revealed and, when you've worked the product into the whole area, you can buff away the residue using a clean portion of your Work Cloth.
As we said, bare metal exhaust tips can be just the start, every vehicle will be different, so spend some time searching for those smaller metal parts that will add up to make a big difference to your finished detail. This car in particular has metal door sill protectors and door latches which we tackled in minutes using a little more Mercury.
And suffice to say there's usually plenty of other uses for Mercury and Mercury Xtreme depending on the vechile in question.
Mercury Metal Polish is an advanced abrasive compound developed specifically for restoring bare metal to a factory fresh finish. Suitable for use on all types... See product details More
A little professional finesse can go a long way in any interior and there are various tricks of the trade you can use to enhance any detail. Here of course, we're talking about the finer details and common places that are often missed, because you will have already cleaned the majority of your cabin as part of your detail.
When finishing off any interior detail, the key is to take a step back and think about how to go that extra mile. Removing cup holders and door card inserts for extra cleaning is a great example, these are notorious for hiding debris and sticky residues from spills. The good news is that these problems can be easily rectified by both cleaning the area underneath and cleaning the insert itself. All you need here is a little Total Interior Cleaner agitated with a soft Detailing Brush, followed by a wipe over with a microfibre cloth.
Don't forget those hidden areas such as spare wheel wells, headlinings and under seat cushions, and always pull seatbelts out all the way to clean them thoroughly. These areas tend to be missed when performing quick routine maintenance and, although you may not be accessing them all of the time, it's surprising at how dirty they can become over time. Seatbelts and head-linings are also notorious for holding onto odours from food and cigarette smoke.
Cleaning all of these areas is simple though, generally speaking we can vacuum away any loose dirt and then deep-clean and sanitise using Total. Total can be applied directly to all surfaces, agitated with a brush (Detailing Brush for hard plastics/rubber, and Upholstery Brush for cloth, leather and carpet) before wiping away any drawn-out grime with a clean microfibre Work Cloth.
A professional tip for glove-boxes is to always consider who the car belongs to. Some people will use these storage areas for personal documents, so it is worth being mindful if you're cleaning a vehicle for a friend or a client. In most cases it pays to ask if they would like this task completed. For other personal belongings in and around the vehicle, be clear on where they would like these moved to. Keep them tidy, perhaps have a plastic bag to tuck them away neatly, for professional detailers look at this as a marketing opportunity - a plastic bag with your company logo could set you aside from the rest.
Another key consideration - especially for professional detailers and valeters - is the impact of the job. Simple tweaks to your routine such as straightening air vents and aligning centre console buttons make a small, but significant difference to the overall look.
Align the air vents so they are all uniform and, where applicable, move any dials to the 12 o'clock position. Obviously, use your own judgement here, you may want to avoid moving any heater dials or other sensitive controls. The object is to impress the client, not annoy them.
Finally, we've talked about cleaning the seatbelts themselves, but don't forget the buckles. These fiddly areas are particularly adept at picking up dust and spills. Like any area that sees significant human contact there can be plenty of body oils and sticky fingerprints. Again, a little Total sprayed onto a Detailing Brush is the answer. Fastening rear seatbelts is another way of showing your customer that you've gone the extra mile to be extremely thorough with your detail.
Auto Finesse Total is a ready to use car interior cleaner which is safe to use on all interior car surfaces. Whether you are cleaning plastic, vinyl rubber, cl... See product details More
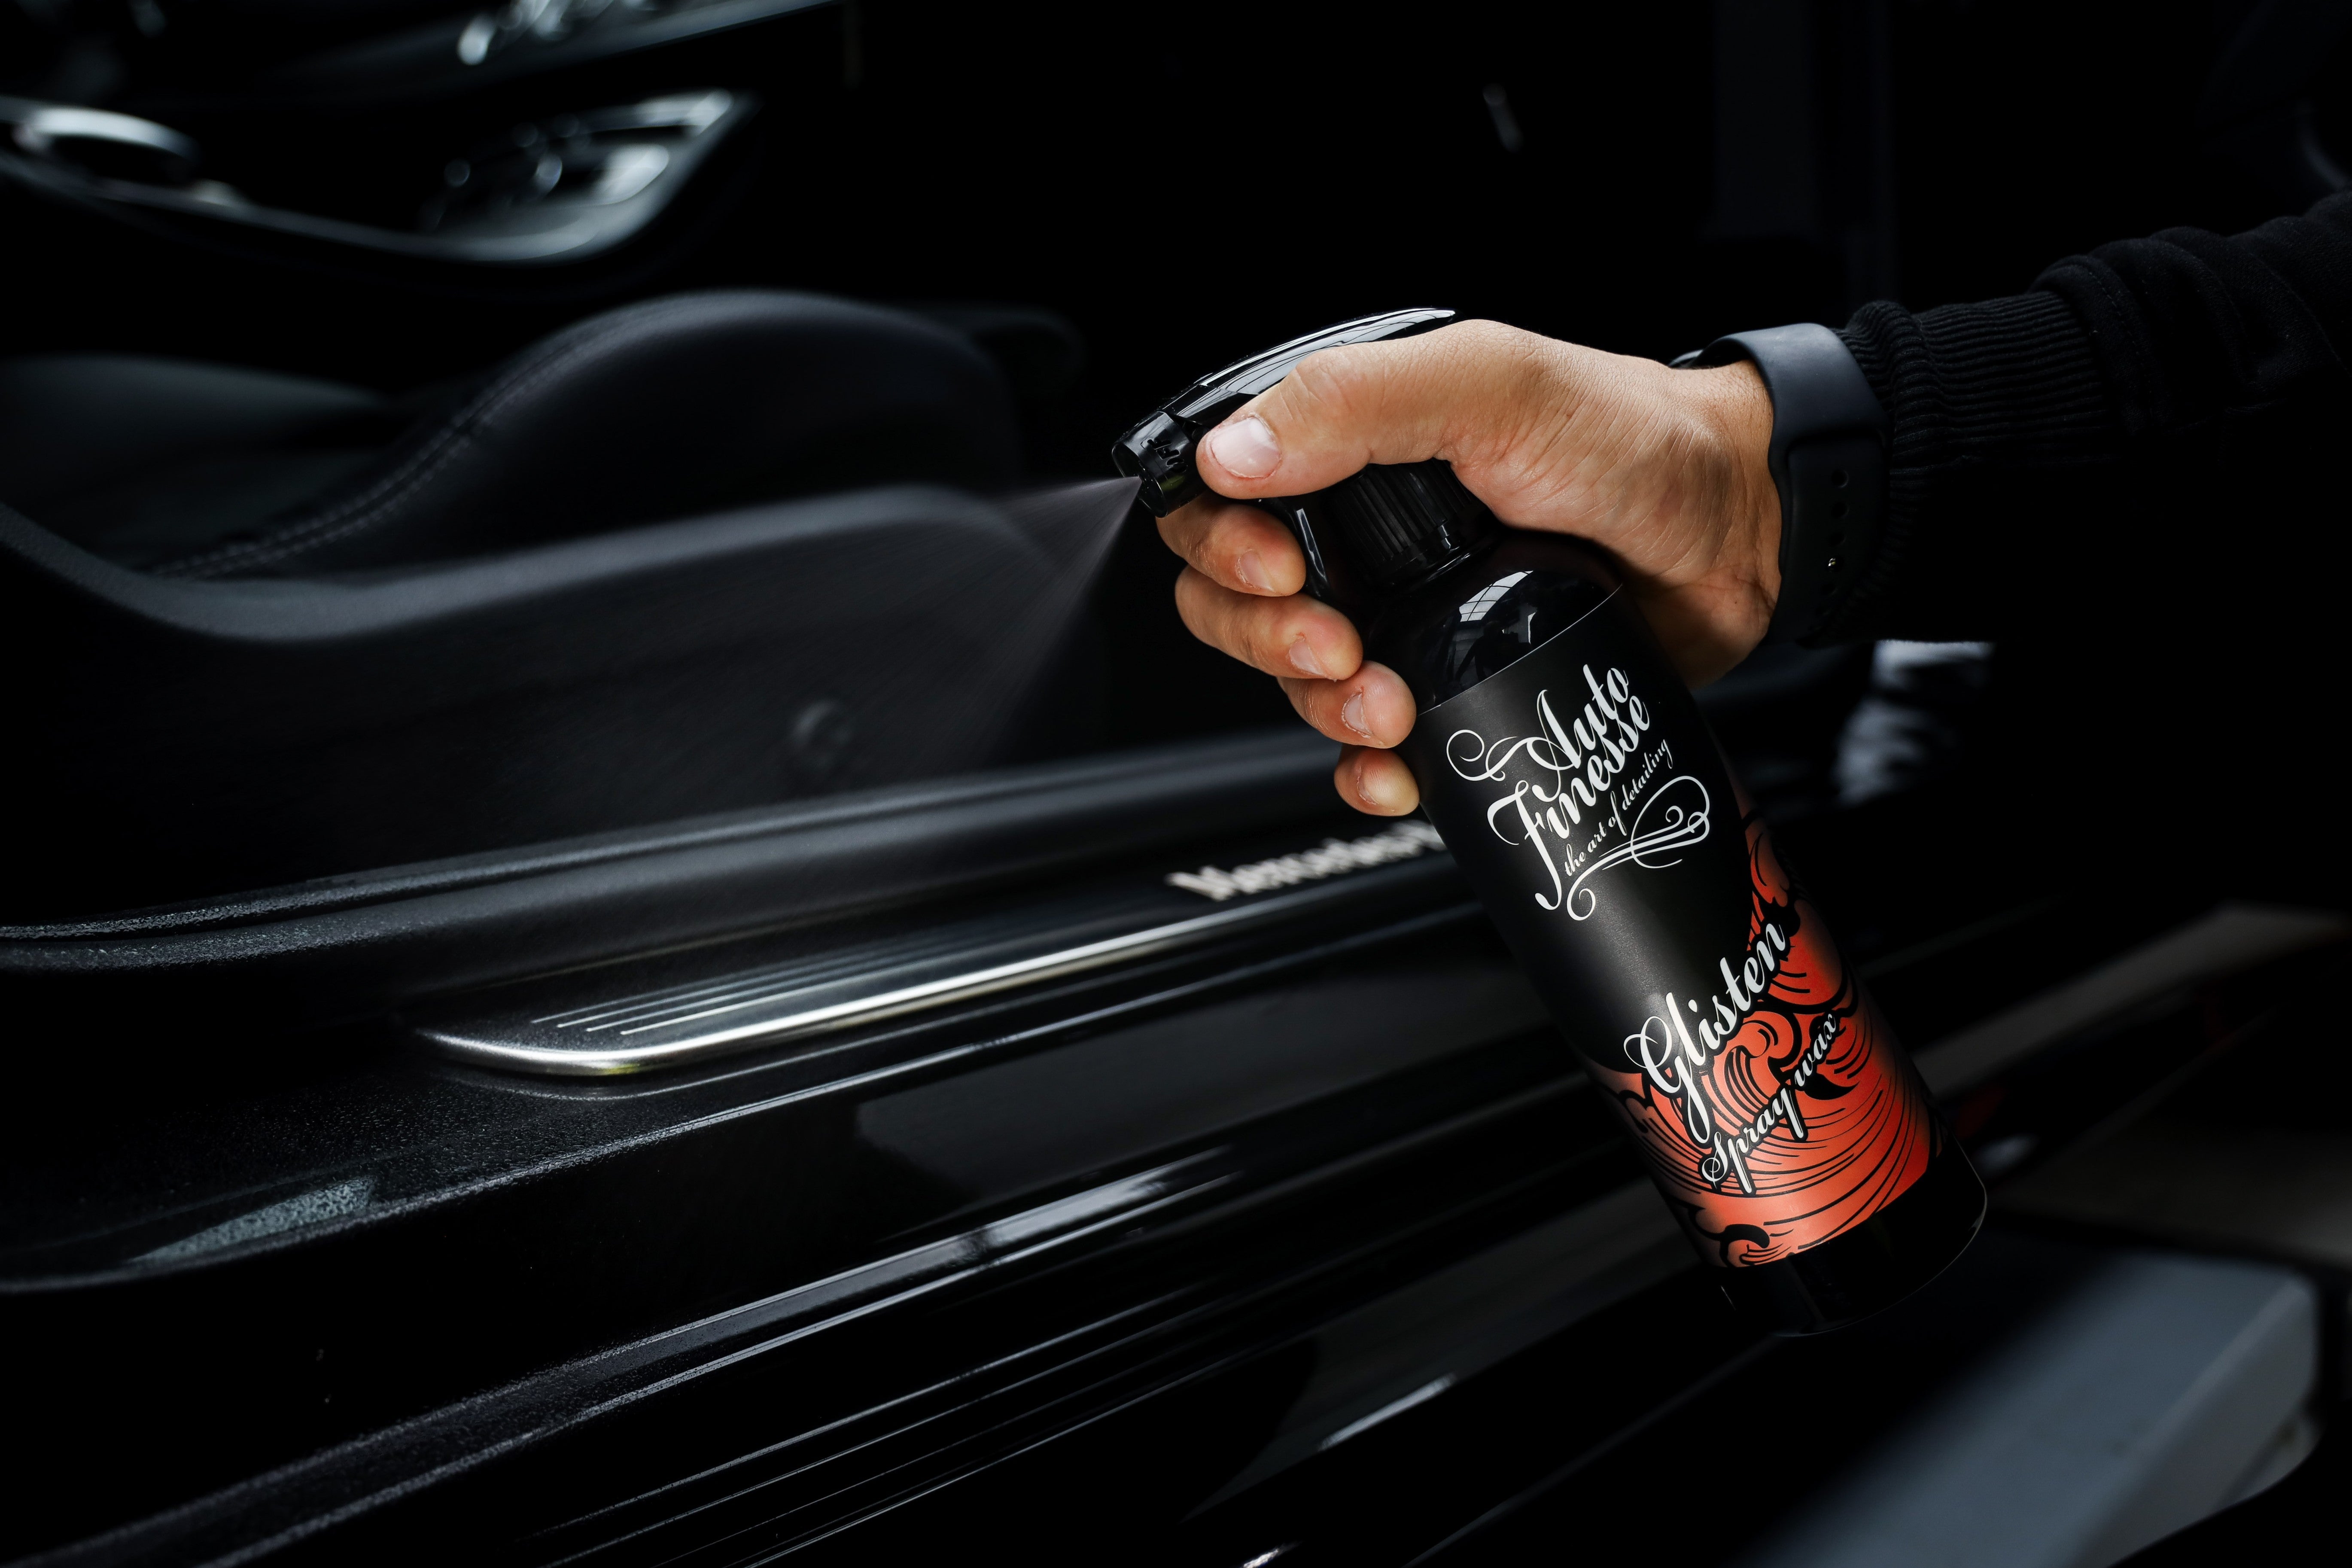
When finishing up your detail it pays to take care of the areas that may not be quite so obvious. Glisten Spray Wax - our easy to use carnauba emulsion finishing spray - can be particularly useful for areas such as the door jambs, boot shuts and bonnet returns. This product not only adds a whole load of shine but will also leave behind a layer of wax protection that lasts for up to 4-weeks. This not only looks good but will also aid future detailing by helping to prevent dirt and dust build-up, making for easier cleaning the next time around.
Simply spritz a little Glisten directly onto the area (or onto a microfibre cloth for more targeted application) and then spread and buff to a shine with a fresh cloth. Using Glisten is also a great way of treating inside panel gaps and other awkward unseen areas - a quick spritz will keep them protected and stop the grime from bonding to the surfaces.
Even if your car is gloss vinyl wrapped, Glisten is the answer to adding a little hydrophobic protection, and a whole load of water beading along the way. This versatile, quick-to-use product is a must in any comprehensive detailing kit.
Glisten is a high-tech spray car wax specifically developed for a speedy finish with 4-weeks of protection and acres of gloss… and all with nothing more than a... See product details More
When we talk about final finishing in detailing, we're referring to the very last stages, after which you either get to stand back and admire the transformation or hand the vehicle back to the customer. Again, this is all about the overall impact, which you won't want ruined by dust or stray fingerprints.
The truth is that it's almost inevitable that a car will pick up a few light imperfections while you complete the rest of your detail. Whether that's, fingerprints, polish residue, wax residue or dust, the idea is to avoid these detracting from the work you've put in elsewhere.
What with the glass and the paintwork often being the main focus for any observer, ensure that these are always perfected at the very end of your detail. A final wipe down in these areas also gives you the chance to take a closer look, inspecting more thoroughly to see if there's any problems that need rectifying.
Our top professional tip for finishing is to not only be mindful of the products you use, but the accessories, too.
For glass surfaces we always finish with Crystal Glass Cleaner and a Superior Waffle, tackling a manageable section at a time. Crystal is a solvent-based cleaner used to cut through grime and sticky residues, and the Superior Waffle is constructed from a special microfibre weave material designed to pick up and trap dust and product residues. These are held in the special pockets, away from surfaces, to help prevent any smearing.
When finishing paintwork, again it's a good idea to use a premium microfibre towel and keep it specifically for this task. Our ultra-soft Primo Plush Microfibre is the ideal finishing cloth because it has a deep, fluffy pile that will hold away dust and residues but is also extremely absorbent, helping it to soak away any excess finishing spray.
Finale Quick Detailer is our go-to product for final finishing paintwork and vinyl wraps, this water-based, wax-infused formula adds plenty of shine and even a little wax protection, but most of all it's extremely easy to use.
Working one panel at a time, we simply mist directly onto the bodywork (at a 15-20cm distance) before using our Primo Plush Microfibre to spread and buff away any excess. After folding your towel and buffing to a final finish you'll not only see plenty of gloss, but a pleasing warm carnauba glow, too.
When using finishing sprays remember that a little goes a long way, just a spritz or two misted over each panel is enough, any more and you're essentially wasting product.
Congratulations on completing the Finesse Your Detail course!
Before you go, don't forget to have a peek at some extra resources that you can take advantage of right now to continue your learning. We have a whole selection of online resources in the Guides section of our blog.
We welcome your feedback and hope you've enjoyed the course. Don't forget to shout about your new skills and knowledge, and share your progress on Social Media, too!
If you have any questions after you go, please don't hesitate to send an email to support@autofinesse.com